El Camino Central Forum banner

Richp85elco's 1985 El Camino

27K views 62 replies 18 participants last post by  HKDUP87  
#1 ·
Year and Model: 1985 El Camino
Engine Specs and Modifications: In 350, out 305
Drivetrain Specs and Modifications: 200-4r, Limited slip Diff with 3.73 gear ratio


Starting this thread to sort of keep me motivated, as my engine swap kind of developed into a whole lot more work :nanawrench:

Picked up this engine mild 350 4bolt mains a couple weeks ago from a member here Kerno you can kinda see his beautiful beast in the background (modifications to come)
Image


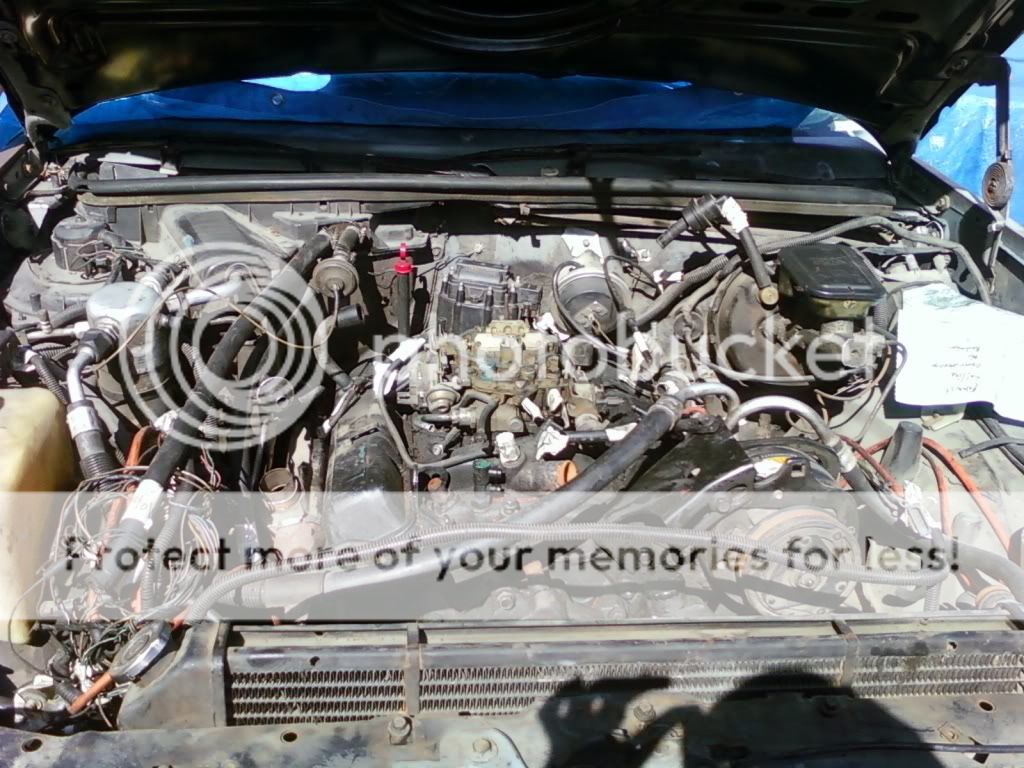
Started my engine swap last week when I began with this POS 305, began labeling disconnecting wiring harness and vacuum lines etc. The wiring was completely distroyed by the P.O and many of the plugs were either disconnected or melted, lots of wires were stripped. Im amazed there wasn't a fire when I use to drive it.
Image


Front Clip and Cowl hood off and in the bed

Image


Tragic discoverys :let_it_all_out:
Damaged AC box

Image


Example one of many damaged/ cut wires just hanging
Image


Even CA cars are not safe, looks like something punctures the floor board and was just sealed with silicone which probably led to rust next to it

Image


Damaged wheel wells

Image


More to come! :nanawrench:
 
#3 ·
Engine and trans coming out!

Image


Image


Image


Mission Complete :smileyb:
Image


BTW I dont have a uni brow, those of you with glasses can probably relate. When you feel your glasses failing off your face us 4 eyes tend to push them back up by the bridge of our nose. I just happened to do it with grease on my fingers LOL. Ive actually walked in public like that without a clue as to why people are staring when I go to auto zone or something
 
#5 ·
The aftermath:

Engine bay I will be cleaning and painting.
Image


exhaust
Image


Stupid leaking stearing box, which has cause massive amounts of caked on grease and grime
Image


Althought it did keep steering parts protected from rust and bushings lubricated lol
Image


Pics of exhuast system now for sale! I have headers and true dulas coming.

Bolts on to factory 305 manifolds like mine which are pictured in other post.

Straight pipe no cat (although can be added simply and cheaply), 1 flowmaster, dual tips dumps behind wheels, does not require special cross member. Very good condition, no rust, tips have good chrome they are just very dirty the cars been sitting for months. It is very loud even with that POS 305 I was running, it sets off alarms....(if your close enough..haha)

Dont know why it looks like its cut off in the middle in this pic but its not
Image


Chrome Tip, has one on both sides
Image


More updates mañana!
 
#9 ·
Thanks for the kind words. I''m getting a lot done, disassembled the front end today. I will post more pics sunday when I have the front end assembled again.

Kern thanks I will try and use the schematics on my haynes manual first although its probably very vauge. I have a couple things to take care of before I get to the wiring. About the steering box I am in need of a new one but I'm looking for a quick ratio box out of a monte carlo ss perferably. Pm me the details

Also any one know how to remove the pitman arm off the box?, I have been unsuccessful so far. I have tried using the ball joint seperator, a BFH, and about all I can think of. Or will the new steering box come with it already pressed on?
 
#10 ·
Pitman-arm puller daddy-0. I got three of um. Doesn't help much, I know! I had to pull one on a jeep, and thought I was going to have to heat the pitman arm to get it off. Do you have a partstore that 'rents' out tools like a pitman arm puller? That would be the best way to go. If you buy one, don't buy a cheap one...
 
#12 ·
Dissasembled the Front end this weekend
Image


My order came in Sat to rebuild steering linkage/ front end. New idler arm, inner, outer tie rods, sleeves, centerlink, upper and lower ball joints, sway bar endlinks and frame mounts. Price for generic replacement parts was less than half the price of moog, I was really tempted but I don't want to have to do this twice any time soon. And for the price this car better ride like a caddy!

Springs and shocks and control arm bushings were relatively new before I let the car sit. So they will be reused

Image


Proms coming soon, so guess who needs money. Bro degreasing, to get parts ready for paint.

Image


Frame, control arms, sway bars, jounce bars clean and ready for sanding and paint..

Image


Image


I got the frame and everything above sanded and hit them with two coats of rustoleum rusty metal primer and will get them painted within a couple days and post some pics. It looks a hell of alot better!

Fun stuff, engine goodies, felpro gaskets, arp bolts, cloyes true double roller, comps cam and lifter magnum 270h, headers and distributor should be arriving tomorrow.

Image
 
#14 ·
Steering Box

Looks like your doing a good job. Now would be a great time to change the body mounts.
On my 86, I used a steering box out of an 88 Camero Iroc. (HD)with the IROC pitman arm. Ended up with 2.5 turns lock to lock. The was a little interference, but the grinder took care of it.
rally169
 
#15 ·
I've been sanding, wire wheeling, and painting a lot lately so heres some updates:

Sorry for the bad picture quality, I was using an old phone that had a good camera but while degreasing I got it wet and it died on me. :let_it_all_out: Just imagine everything 10 times better!

Frame in primer
Image


Control arms, jounce bars, sway bars in primer.

Image


Sway bars and jounce bars in red. I know its cliche, I really wanted them a dark purple but couldn't find the paint locally and didn't want to order it. Plus my lady said to do it red so i dedicated those parts to her. lol They look a lot better in person, its a real dark red.

Image


Frame and control arms are gloss black, not as shiny as you would think.

Image


Paint needs to cure for a week so I should start reassembling this weekend.

Also got the engine ready for paint, but there hasn't been much sun lately so waiting for the weather to clear up first. Then the fun starts :nanawrench:
 
#18 ·
Took a trip to the wrecking yard and came up on an upper fan shroud, a grand prix bar, a couple radiater x braces, a couple front spoilers, and fender to core support braces, so it was a good day.

Image


Then I got the Firewall + master cylinder painted
Image


Suspension reassembled and steering (almost) and it finally has its shoes on again...

Image


Image


Also got the block painted a couple days ago so I'm still waiting for the paint to cure and then I should be starting with the cam and lifter swap, new timing set, manifold, and I'm still trying to decide which carb to use. Its between SMI quadrajet and the two other usual suspect, Holly or Edelbrock.

Couple questions
I finally got the pitman arm off after almost beating it to death.. pitman arm puller didn't help, so i used a heat gun and hammered it off which worked pretty smoothly. Now the problem is I cannot get it on the new steering box. :censored:
I have already tried heating it again and lightly hammering on it and its half way there but I dont want to damege the new box. Any suggestions?

Also since I wont be using the computer anymore and if I still want to use a quadrajet, would I have to use a non electronic one and if so how would you set up the choke? and could you convert it to electric choke?

Thanks
 
#19 ·
Got the pitman arm on and torque'd down onto the new steering box :nanawrench:.

I had to rent a 34mm axle nut socket and a 1/2inch torque wrench from autozone to get it to 185 ft/lbs.

Still need some carb advice. Anybody?
 
#23 ·
You may want to come by and look at how I did my A/c pump install using the 6 cylinder lines and condenser so the pump could be mounted high on the right side instead of having the fat discharge line run across the engine.
Yes, that is a nice looking mod. The earlier thirdgen camaros had that problem too... You could always snag the serpentine system from an '88 - '92 camaro V-8. Puts the compressor on the passenger side and alt on the drivers side.
 
#24 ·
Yea I'm not to fond of that fat AC line either.


I've been trying to do some research on converting to serpentine but would you have to flip the heads so the three accessory bolt holes are on the passenger side or would it just bolt in?

Kern,
With your set up do you retain the v-belts, and all of the original accessories? if so that may be the way to go, because I have a brand new OEM compressor in my garage.
 
#26 ·
heres a couple pics of what i did the weekend of the fourth. I really didnt do much this past weekend cause it was my ladys bday so i spent it, and all my money with her, but at least shes 21 now so she can buy me beer
Image


Got my 7qt oil pan painted up in a nice silver and go the felpro gasket on it ready to install.

Image


and heres the motor finally goin in after wht seems like forever.

Image


DAmn it was a pain getting it in i barely had enough room for it to clear with the oil pan on, but i didnt want to risk damging the oil pump or windage tray. It probably would have been easier with a load leveler but I didnt have one. and then once i got it in i realized i put the top clamshells on on the wrong side so i had to lift the motor to switch them, but i got it in sittin pretty

Image


Also picked up a holley 600cfm carb, all i need now are plugs, wires, fluids and filters, air filter, and all the senders to make my gauges work but most importantly all the money to buy that stuff lol.

I also started going thru the wiring tryin to fix what the P.o f'ed up. Anyone know the name of all the senders/parts, necessary for all the gauges to work
 
#28 ·
I probably didnt mention it but smog equipment has been removed and I wont be using the computer none of it worked or was connected when i bought the car, so smog is not an issue. I am using a comp cam, the holley carb, rpm manifold, full length headers and true duals. The trans lock up was never connected but thanks to tranny mike i will be using the method he suggested so I will have lock up.