

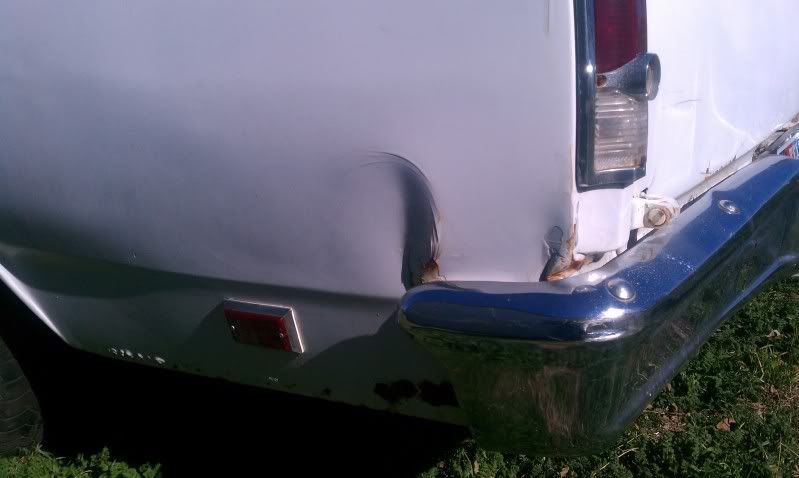
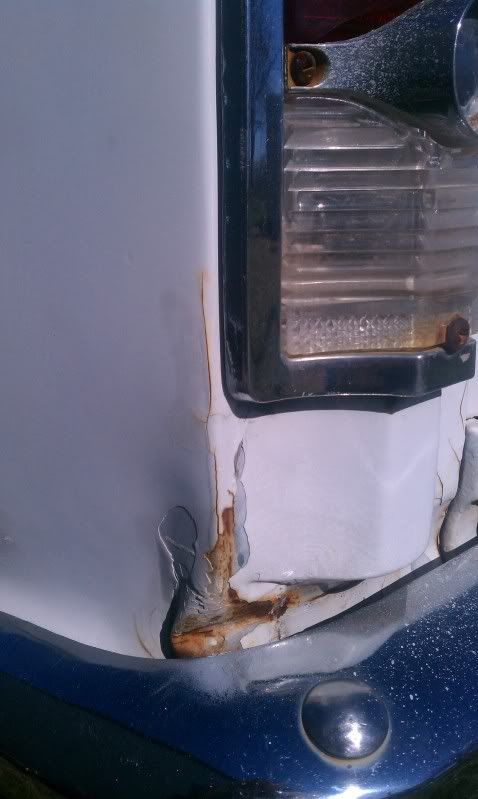
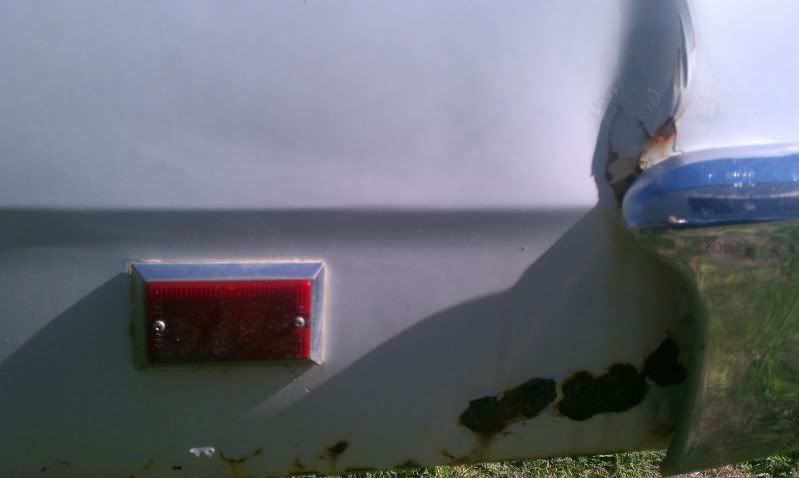
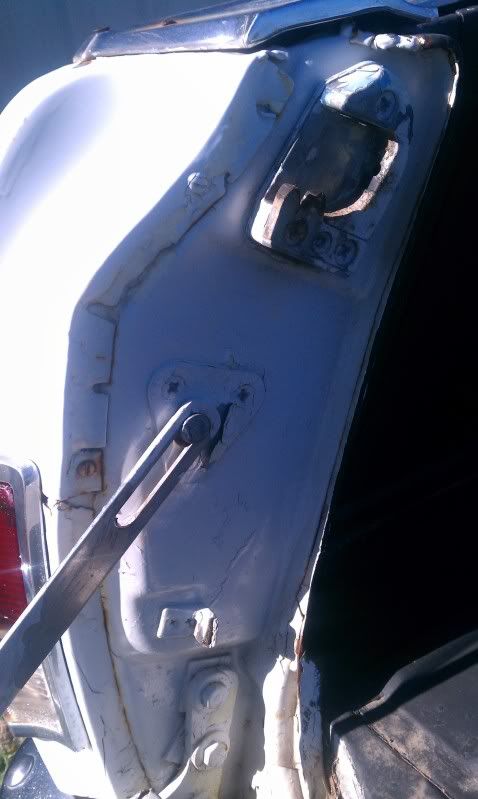
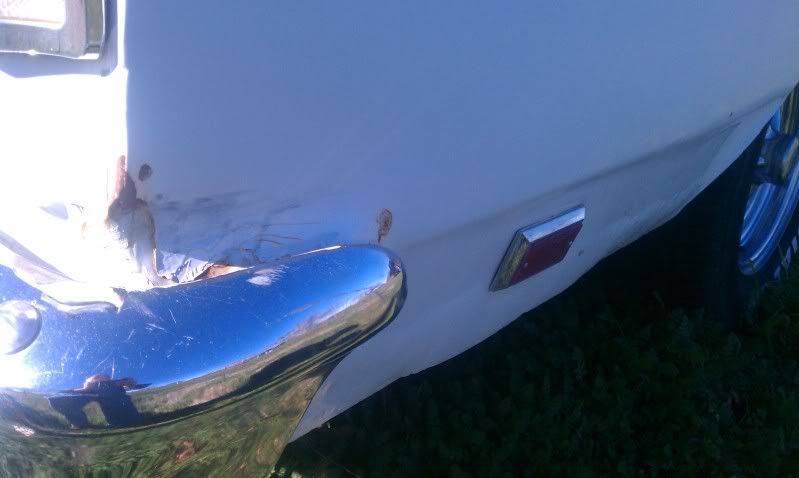
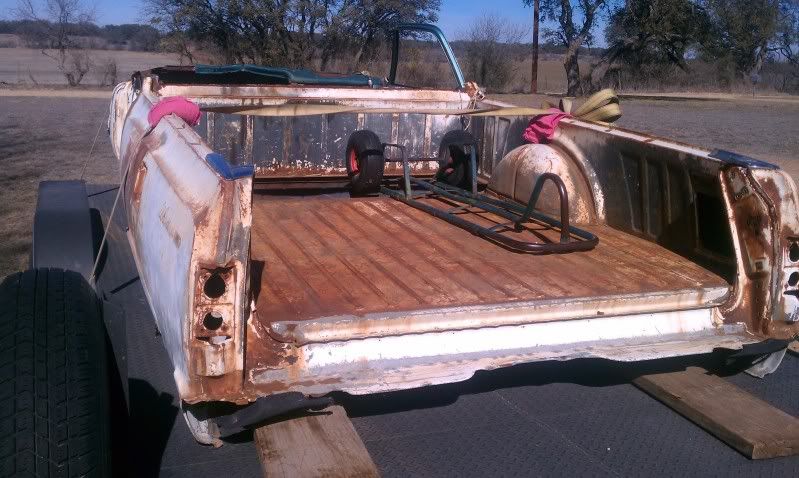
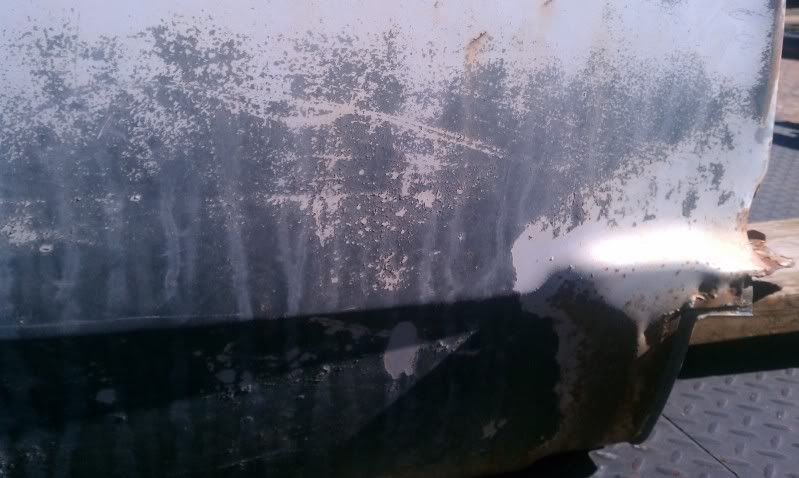
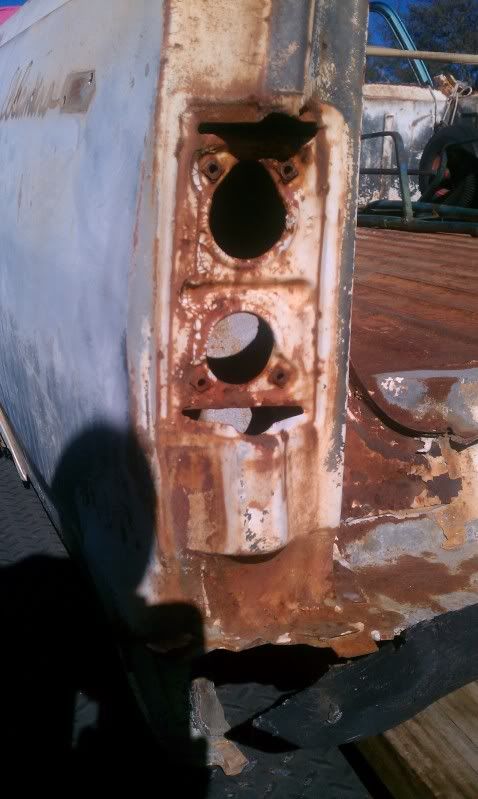
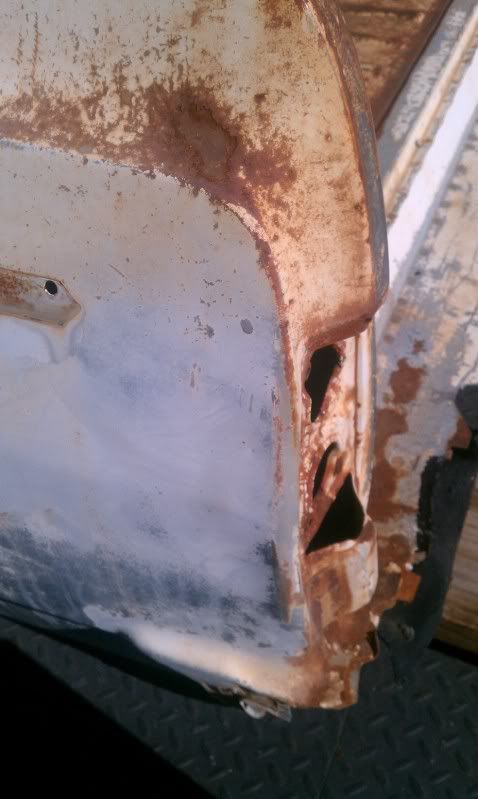
I am looking to finally getting around to fixing the rusted/damaged parts of my 64 bed and yesterday picked up a donor hull to cut the good metal out of. I had initially planned on basically just carefully cutting matching patch panels out of the "new" one to replace what is either damaged or rusted on mine, but upon closer inspection, I think it may be doable to actually clean up the surface rust and paint enough to see where the outer bed skin is spot welded to the inner and remove it that way. I will only be replacing pieces from the rear of the wheel wells back, so I sill still have to make a vertical cut behind the tire, but the more work I can do on the original seams and flanges the better. My questions are, does anyone have any experience with doing something like this and possibly some pointers you can throw my direction? I will be doing just about all of the work myself, including the cutting, welding, prep and painting. Below are some pictures of my current bed showing the rust and damage caused by the bumper being pushed into the body, as well as some pictures of my donor shell. I've circled some of the areas where I will be looking to cut out some of the spot welds, assuming I can actually get to a point where I can tell where they are to drill them out. (Sorry for the crude circles...I already had the pictures in Photobucket, so it's not exactly Photoshop quality...)
![Image]()
![Image]()
![Image]()
![Image]()
![Image]()
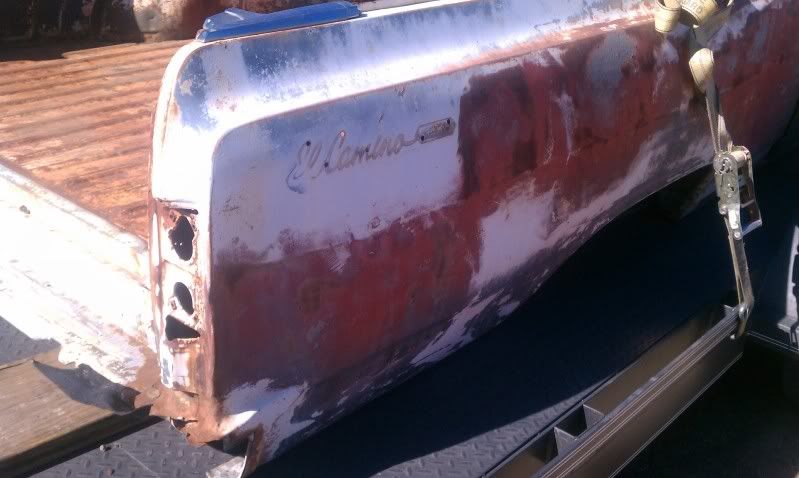
Donor shell...
![Image]()
![Image]()
![Image]()
![Image]()
![Image]()
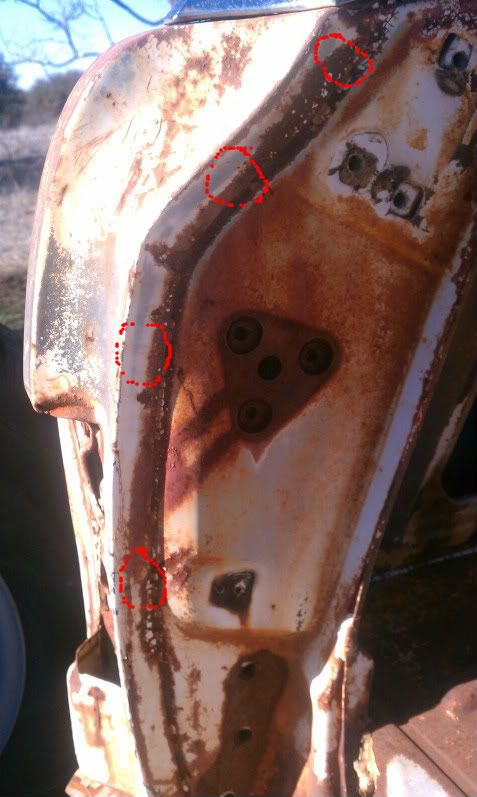
Where I'm assuming I will be cutting spot welds...(in general, not specific locations)
![Image]()
![Image]()
Anyone have any words of wisdom as I move forward with this project? Dos, Don'ts, etc??
Many thanks in advance!!
Donor shell...
Where I'm assuming I will be cutting spot welds...(in general, not specific locations)

Anyone have any words of wisdom as I move forward with this project? Dos, Don'ts, etc??
Many thanks in advance!!


